

Choose a starting point
If this is your first Page, start with Your first Page and send a rehearsal to yourself before you send one to a client.
From a meeting
1
Open a finished meeting
Go to Meetings and open a meeting that has finished. Create Page appears once the meeting ends.
2
Click Create Page
Click Create Page in the meeting view.
3
Choose the client
In Client (optional), select the client or prospect the Page is for. Meeting participants appear first, then your other contacts.
4
Choose a template, or leave it blank
If your organization has Page templates, choose one in Template. Leave it blank and Continuum structures the Page from the meeting.
5
Generate the Page
Click Generate Page. Continuum creates the Page and opens it in the editor with the AI chat beside it.
- Header: your firm logo, your name and photo, and a button for the client to book a meeting.
- Personal message: a note drafted from the conversation.
- Meeting summary: the key points, written for the client.
- Next steps: each with a checkbox, description, due date, and link.
- Attachments: files from the meeting or added while you edit.
- Schedule meeting: a booking section for a follow-up.
From a prompt
Use this for onboarding packages, quarterly updates, proposals, planning ideas, and anything you would otherwise write as a long email.1
Click New Page
Go to Pages and click New Page.
2
Choose the client
Select the client in Client (optional), if you know who the Page is for.
3
Link a meeting, or leave it blank
Use Meeting (optional) if the Page should draw on a past meeting.
4
Choose a template, or leave it blank
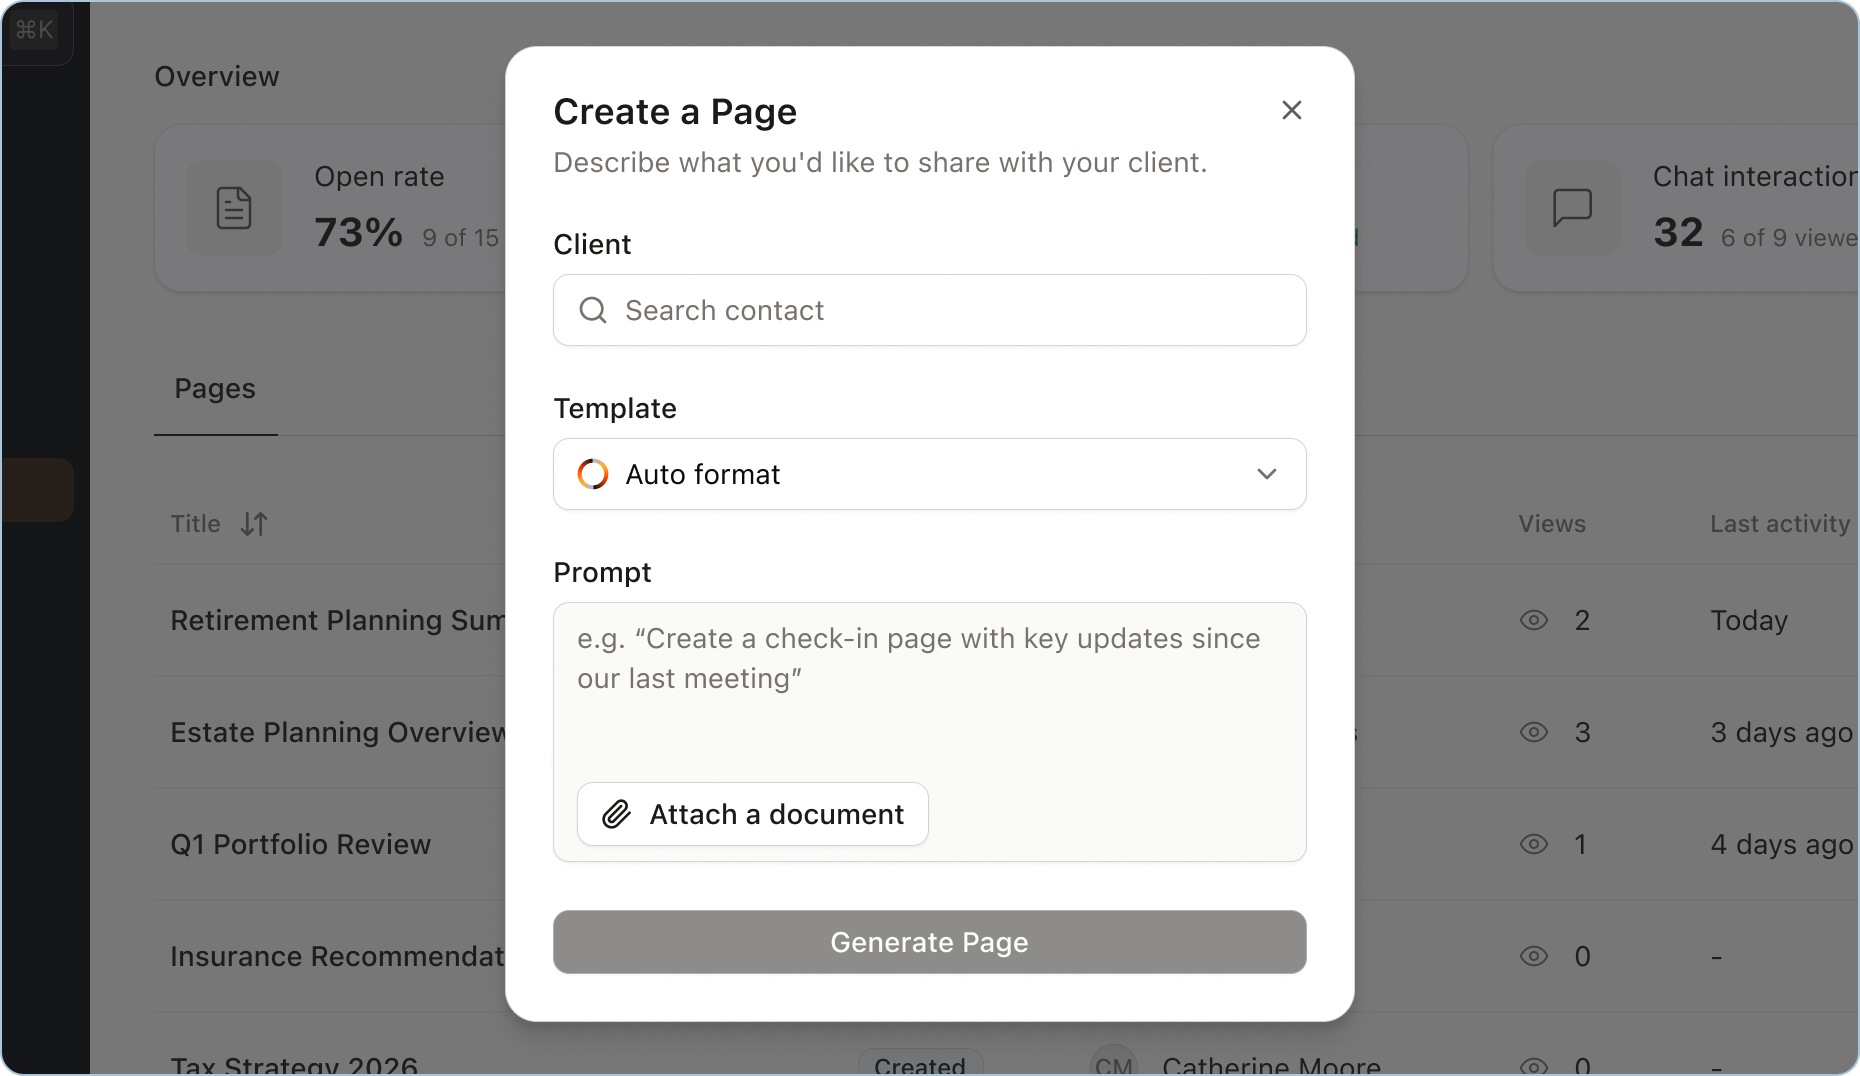
Select a Page template in Template, or leave it blank and Continuum decides the structure.
5
Describe the Page
In Prompt, say what to create. A prompt is required unless you chose a template or a meeting. Click Attach document to add files, or, in the desktop app, click the microphone to dictate. For example: “Put together a welcome page for a new client with the documents they need to review and the next steps for account setup.”
From a document
Use this when a document is the main source, such as a financial plan, statement, proposal, insurance illustration, or onboarding package.1
Click New Page
Go to Pages and click New Page.
2
Choose the client
Select the client in Client (optional), if you know who the Page is for.
3
Attach the document
In Prompt, click Attach document and choose the file, or drag it into the prompt area.
4
Say what to do with it
Say whether the document becomes part of the Page, stays attached for download, or both. For example: “Pull the key projections from this financial plan into the Page as a summary and chart, and attach the original PDF for download.”
5
Generate and check
Click Generate Page. Check every number, assumption, name, and date against the original document.
From a template
Use a Page template for a deliverable you send often, such as a quarterly review, a discovery follow-up, or a plan review. Page templates shape the client-facing Page. Meeting templates shape your meeting summary, and they are separate. See Page templates.1
Click New Page
Go to Pages and click New Page.
2
Choose the client
Select the client in Client (optional), if you know who the Page is for.
3
Choose the template
Select the Page template in Template.
4
Add context
Link a meeting, attach documents, or write a short prompt about what to include.
5
Generate the Page
Click Generate Page. Continuum fills the template’s structure with the context you gave it.
Duplicate an existing Page
1
Find the Page
Go to Pages and find the Page you want to reuse.
2
Click Duplicate
Click the three-dot menu on the Page, then Duplicate. Continuum opens the copy in the editor.
3
Update the client and the content
Change the client, the personal message, numbers, documents, dates, and next steps.
Review the draft before you edit
Read the Page once from top to bottom before you change anything. Check:- Client access: the right clients are listed.
- Personal message: the opening sounds like you.
- Facts and numbers: names, dates, assumptions, and figures are correct.
- Next steps: each action item is clear and assigned to the right person.
- Attachments: only the documents you intend are attached.
- Branding: the logo and colours are current. See Brand setup.
Edit with the AI chat
Type what you want changed in the AI chat beside the Page, review the result, and keep going until the Page is ready. The chat handles small fixes and large changes: correcting a name, adding a section, restructuring the Page, summarizing a document, or updating a chart. If the Page came from a meeting, Continuum already has the transcript. Ask it to bring in something that was discussed but is missing from the draft. For example prompts, see Prompts for editing a Page.Edit text directly on the Page
For a quick text fix, switch the tool pill at the bottom of the editor from Browse to Edit text, click any text on the Page, and type.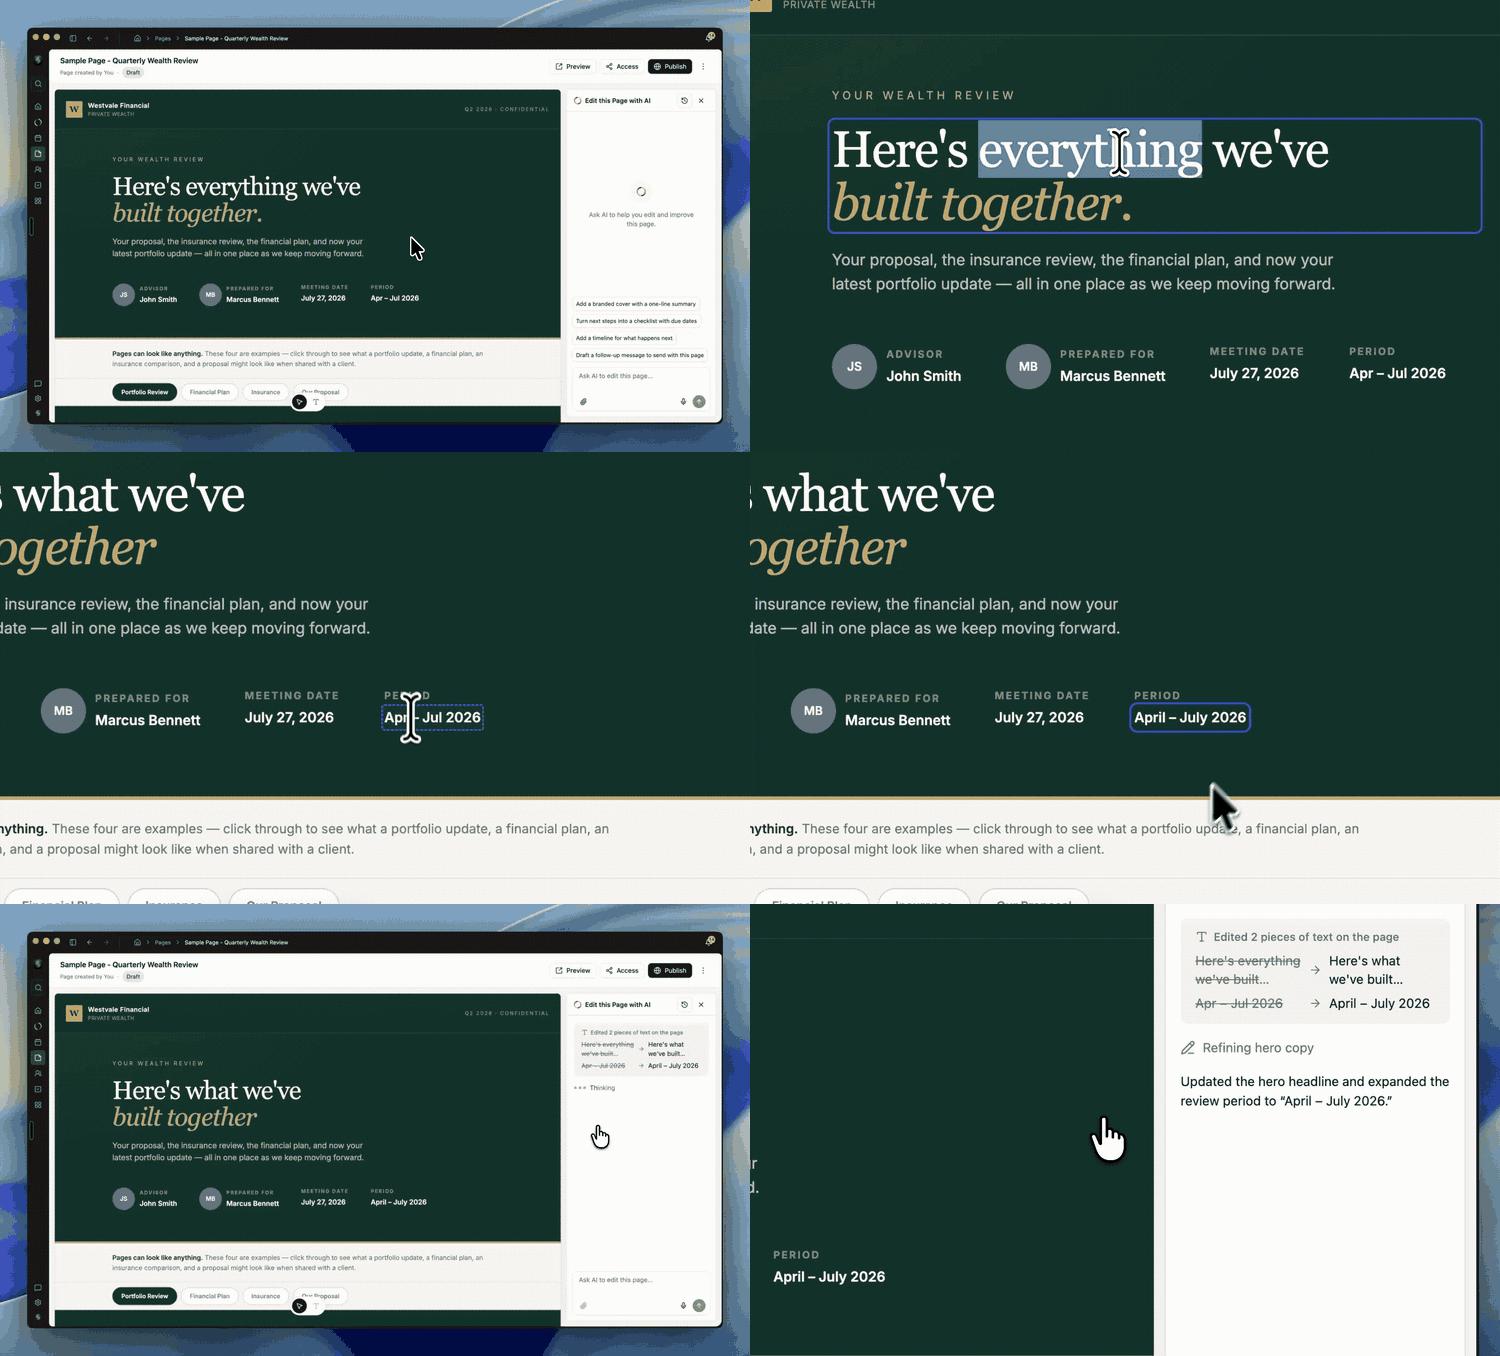
- Click Apply and Continuum updates the Page and summarizes the change in the chat.
- Click the X to discard your edits and keep the original text.
When the AI gets something wrong
Limitations
- You are responsible for what you send. Check facts, numbers, assumptions, client names, and document details before you publish.
- Attachments: up to 10 files per Page, each under 20 MB.
- File types: PDF, Word (.docx), Excel (.xlsx), PowerPoint (.pptx), images (PNG, JPG, GIF, WebP, SVG), and text files such as CSV, TXT, HTML, and Markdown. Older Office formats (.doc, .xls, .ppt) are not accepted. Save them in the newer format first.
- Edit text is unavailable while the AI is generating or applying changes. Wait for it to finish, then try again.
- Dictation works in the desktop app only.
Related pages
- Prompts for editing a Page: example prompts for tone, structure, data, and interactive content.
- Brand setup: your logo, colours, and fonts on every Page.
- Page statuses: what Draft, Published, Opened, and Engaged mean.
- Send and track a Page: publish, share, and see what your client opened.